> For the complete documentation index, see [llms.txt](https://docs.brainboard.co/llms.txt). Markdown versions of documentation pages are available by appending `.md` to page URLs; this page is available as [Markdown](https://docs.brainboard.co/settings/integrations/git-configuration/ado.md).
# Azure DevOps (ADO)
### Add Git connection
To add **Azure DevOps** personal git tokens in **Brainboard****,** you first need to generate an **Azure DevOps** personal access token.
Steps to generate a personal access token on your Azure DO account.
1. Go to your [Azure DO page](https://dev.azure.com/).
2. Click on the top-right icon and then select **`Personal access tokens`**:
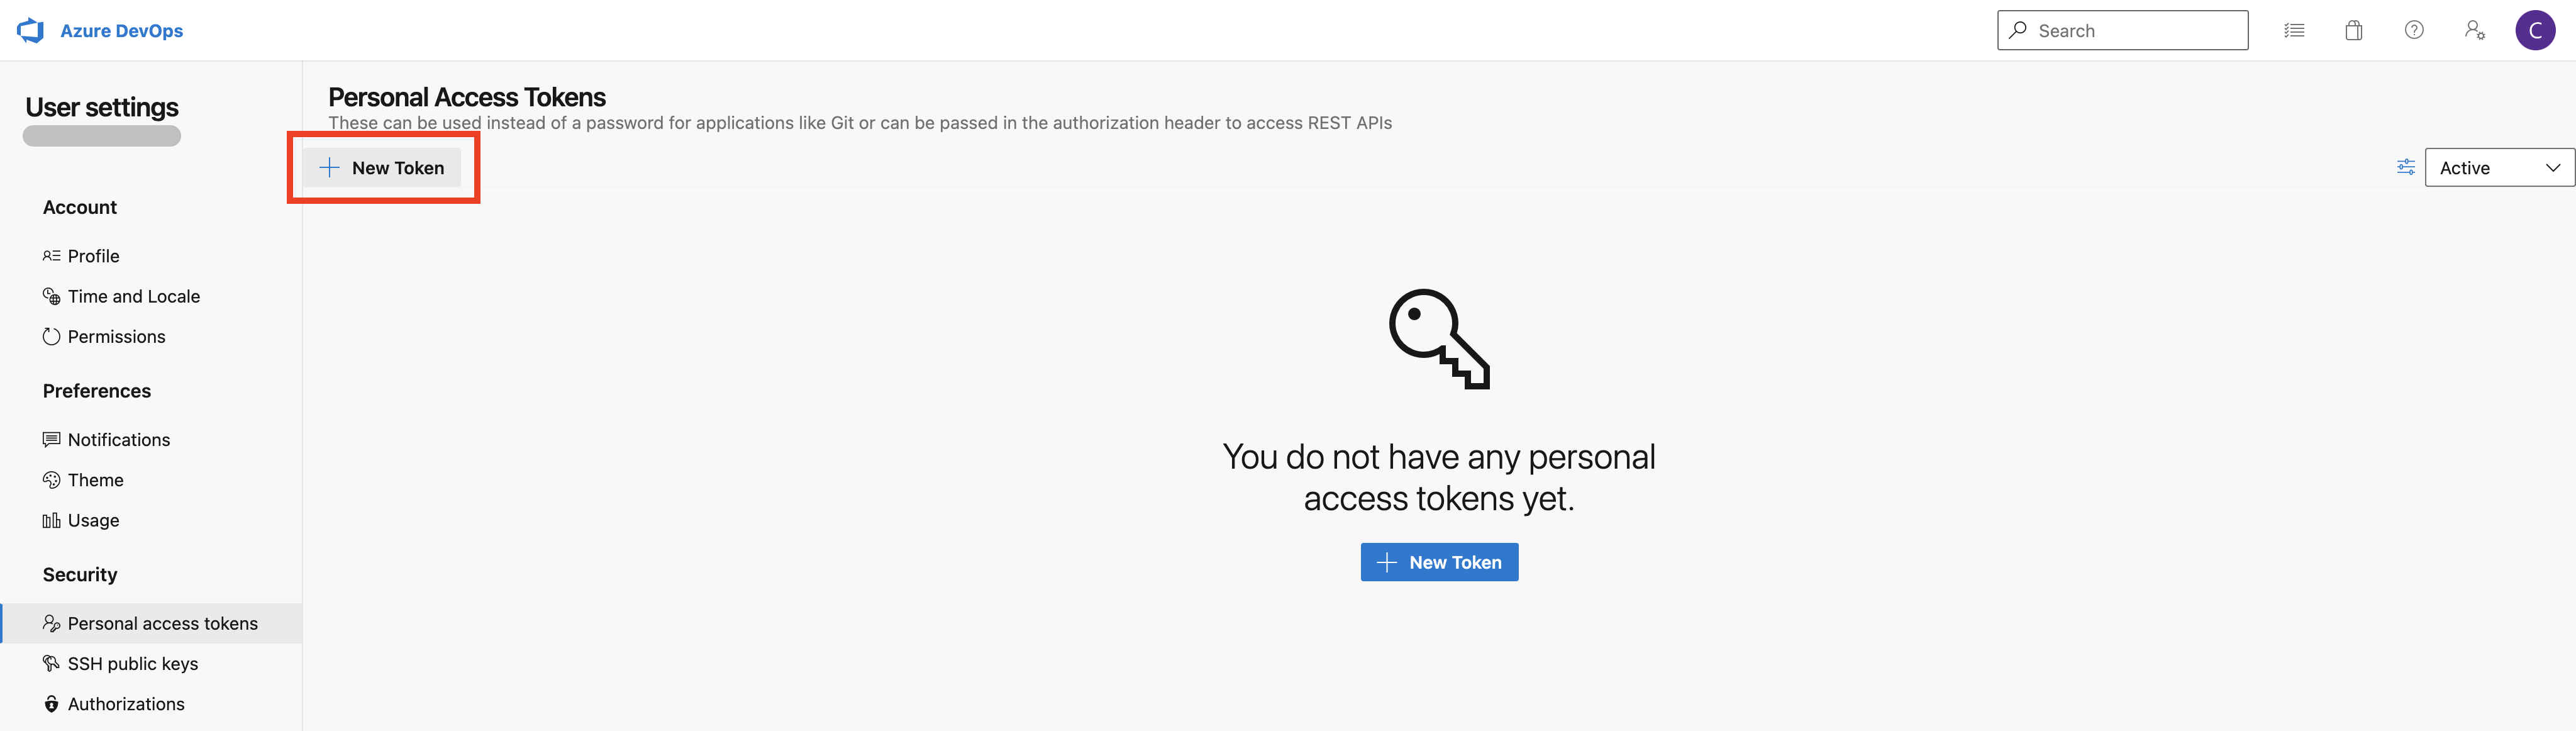
3. It will open the **Personal Access Tokens** page. Click on **`New token`** button.
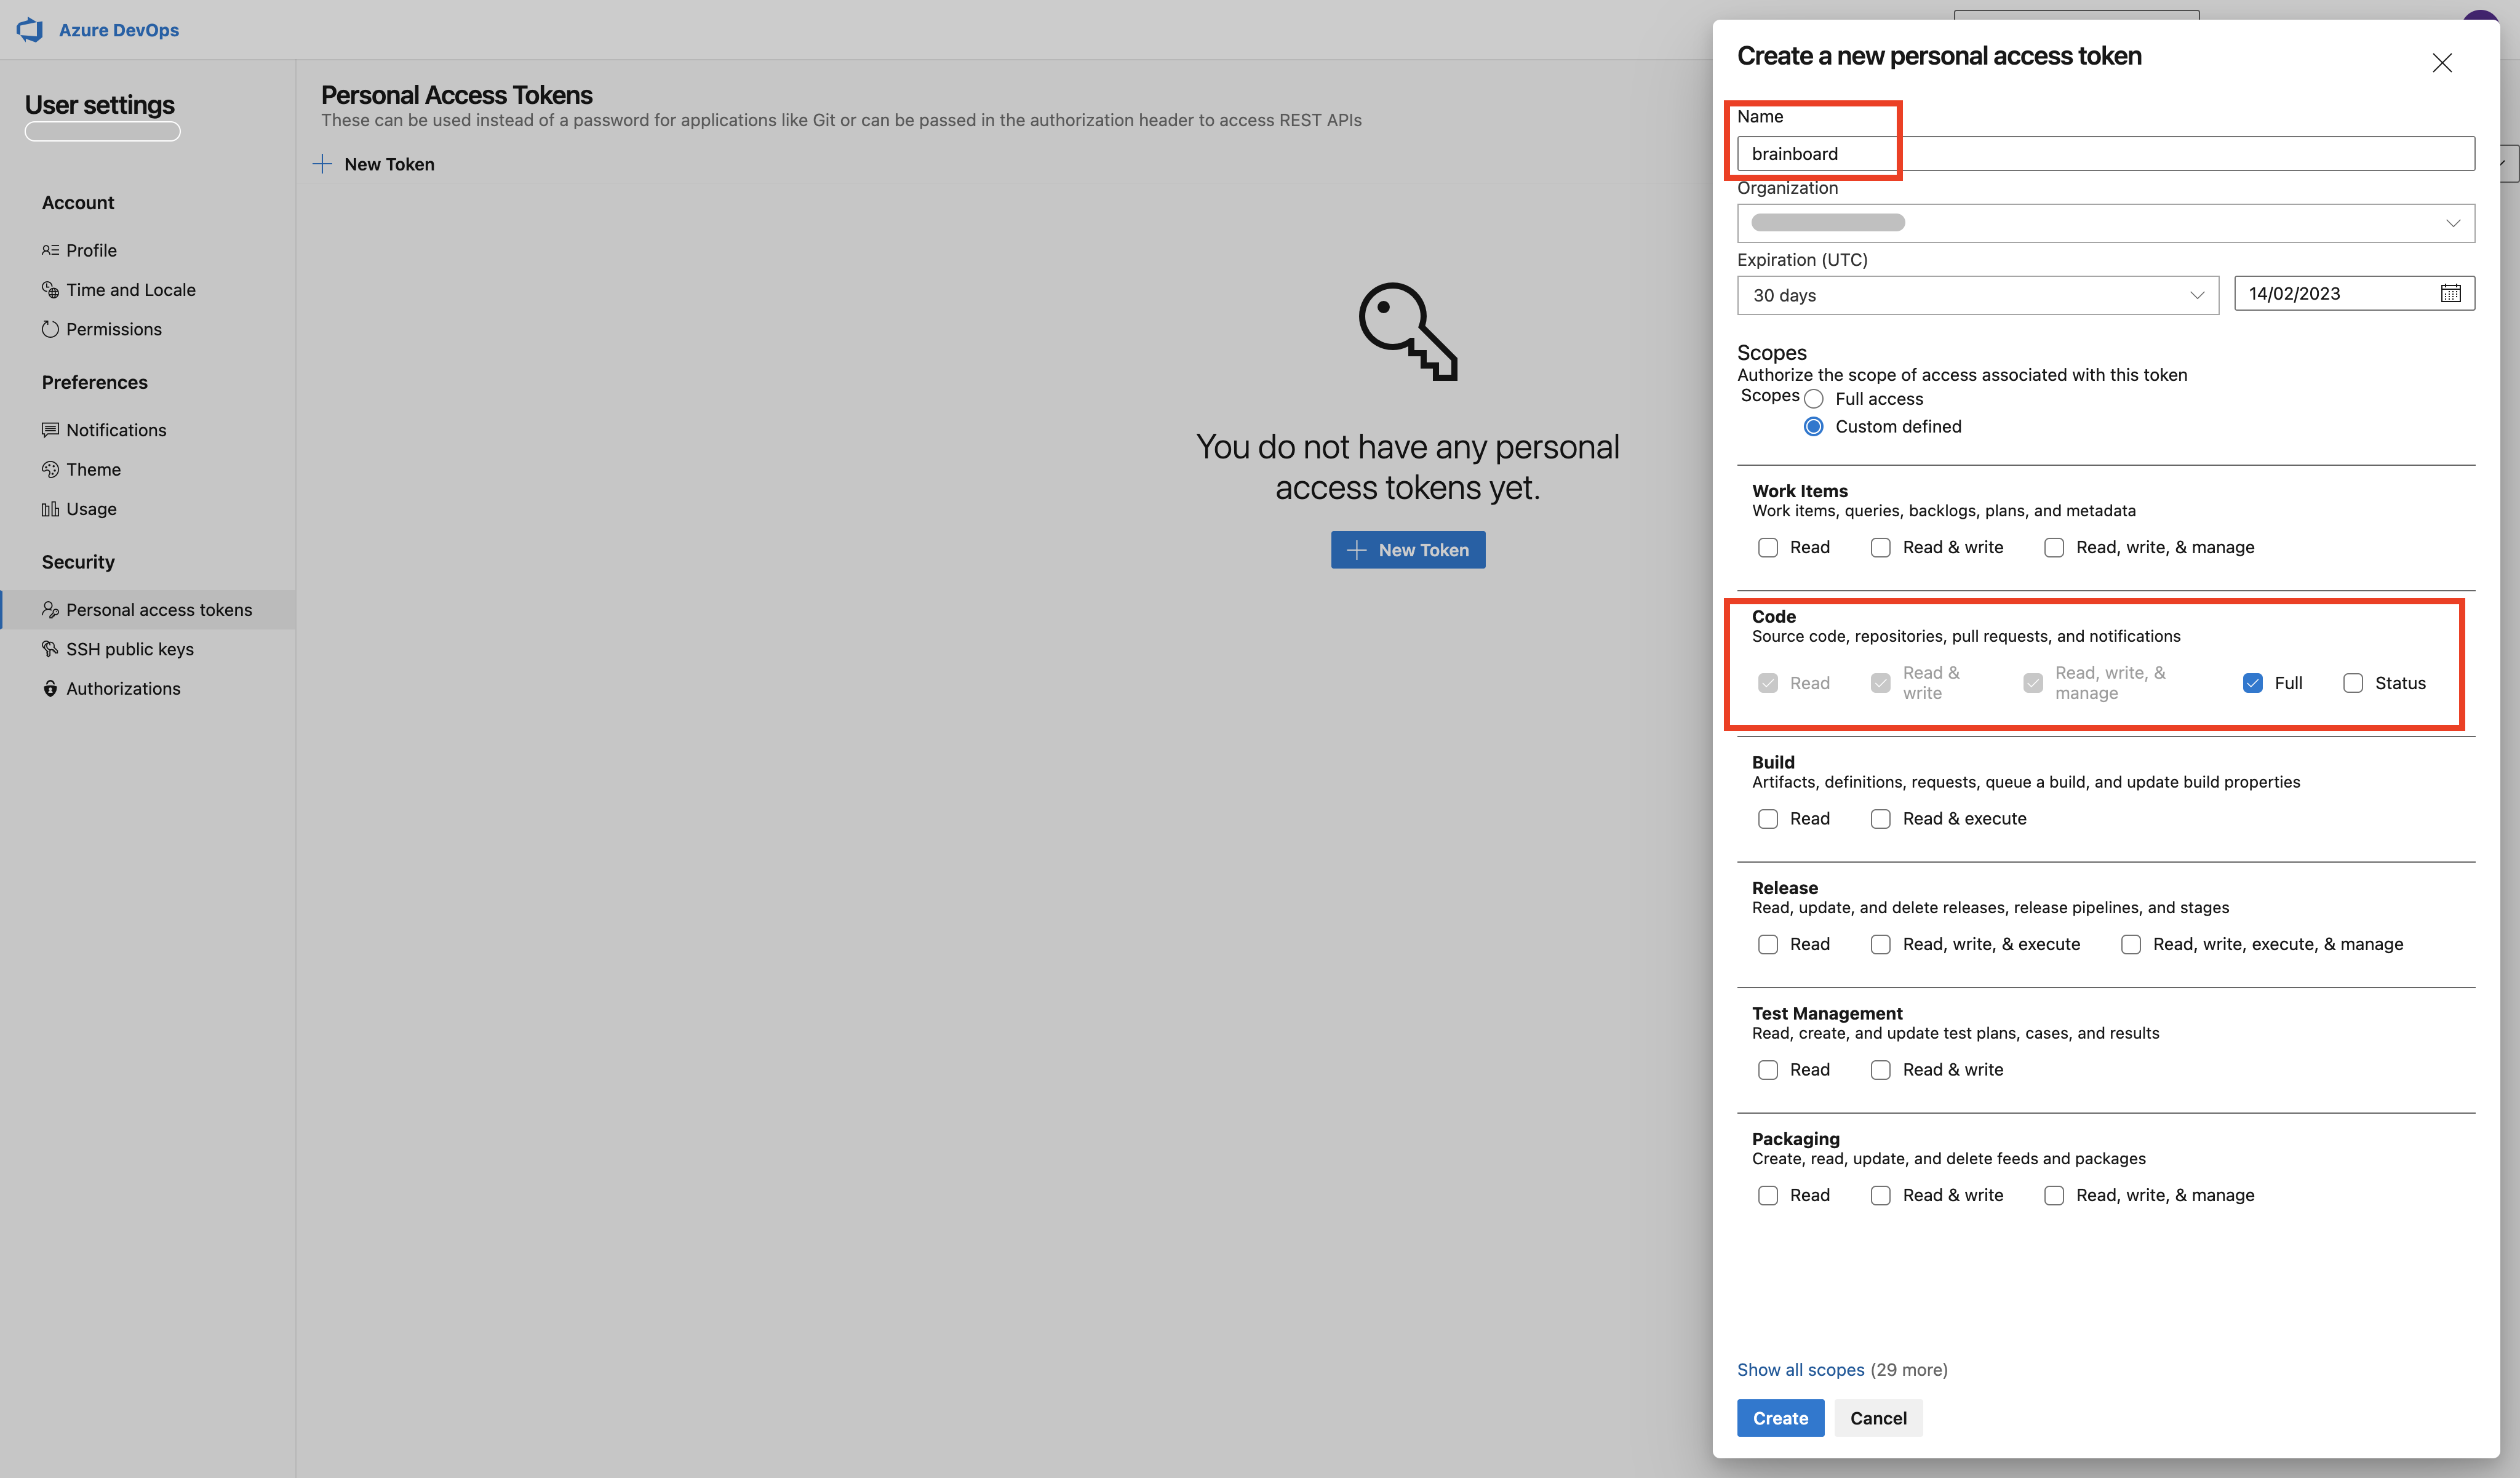
4. In the modal, add the following information:
* **Name** of the token.
* You can set an **expiration date.**
* In the **`code`** section, select **`Full`**** ****.**
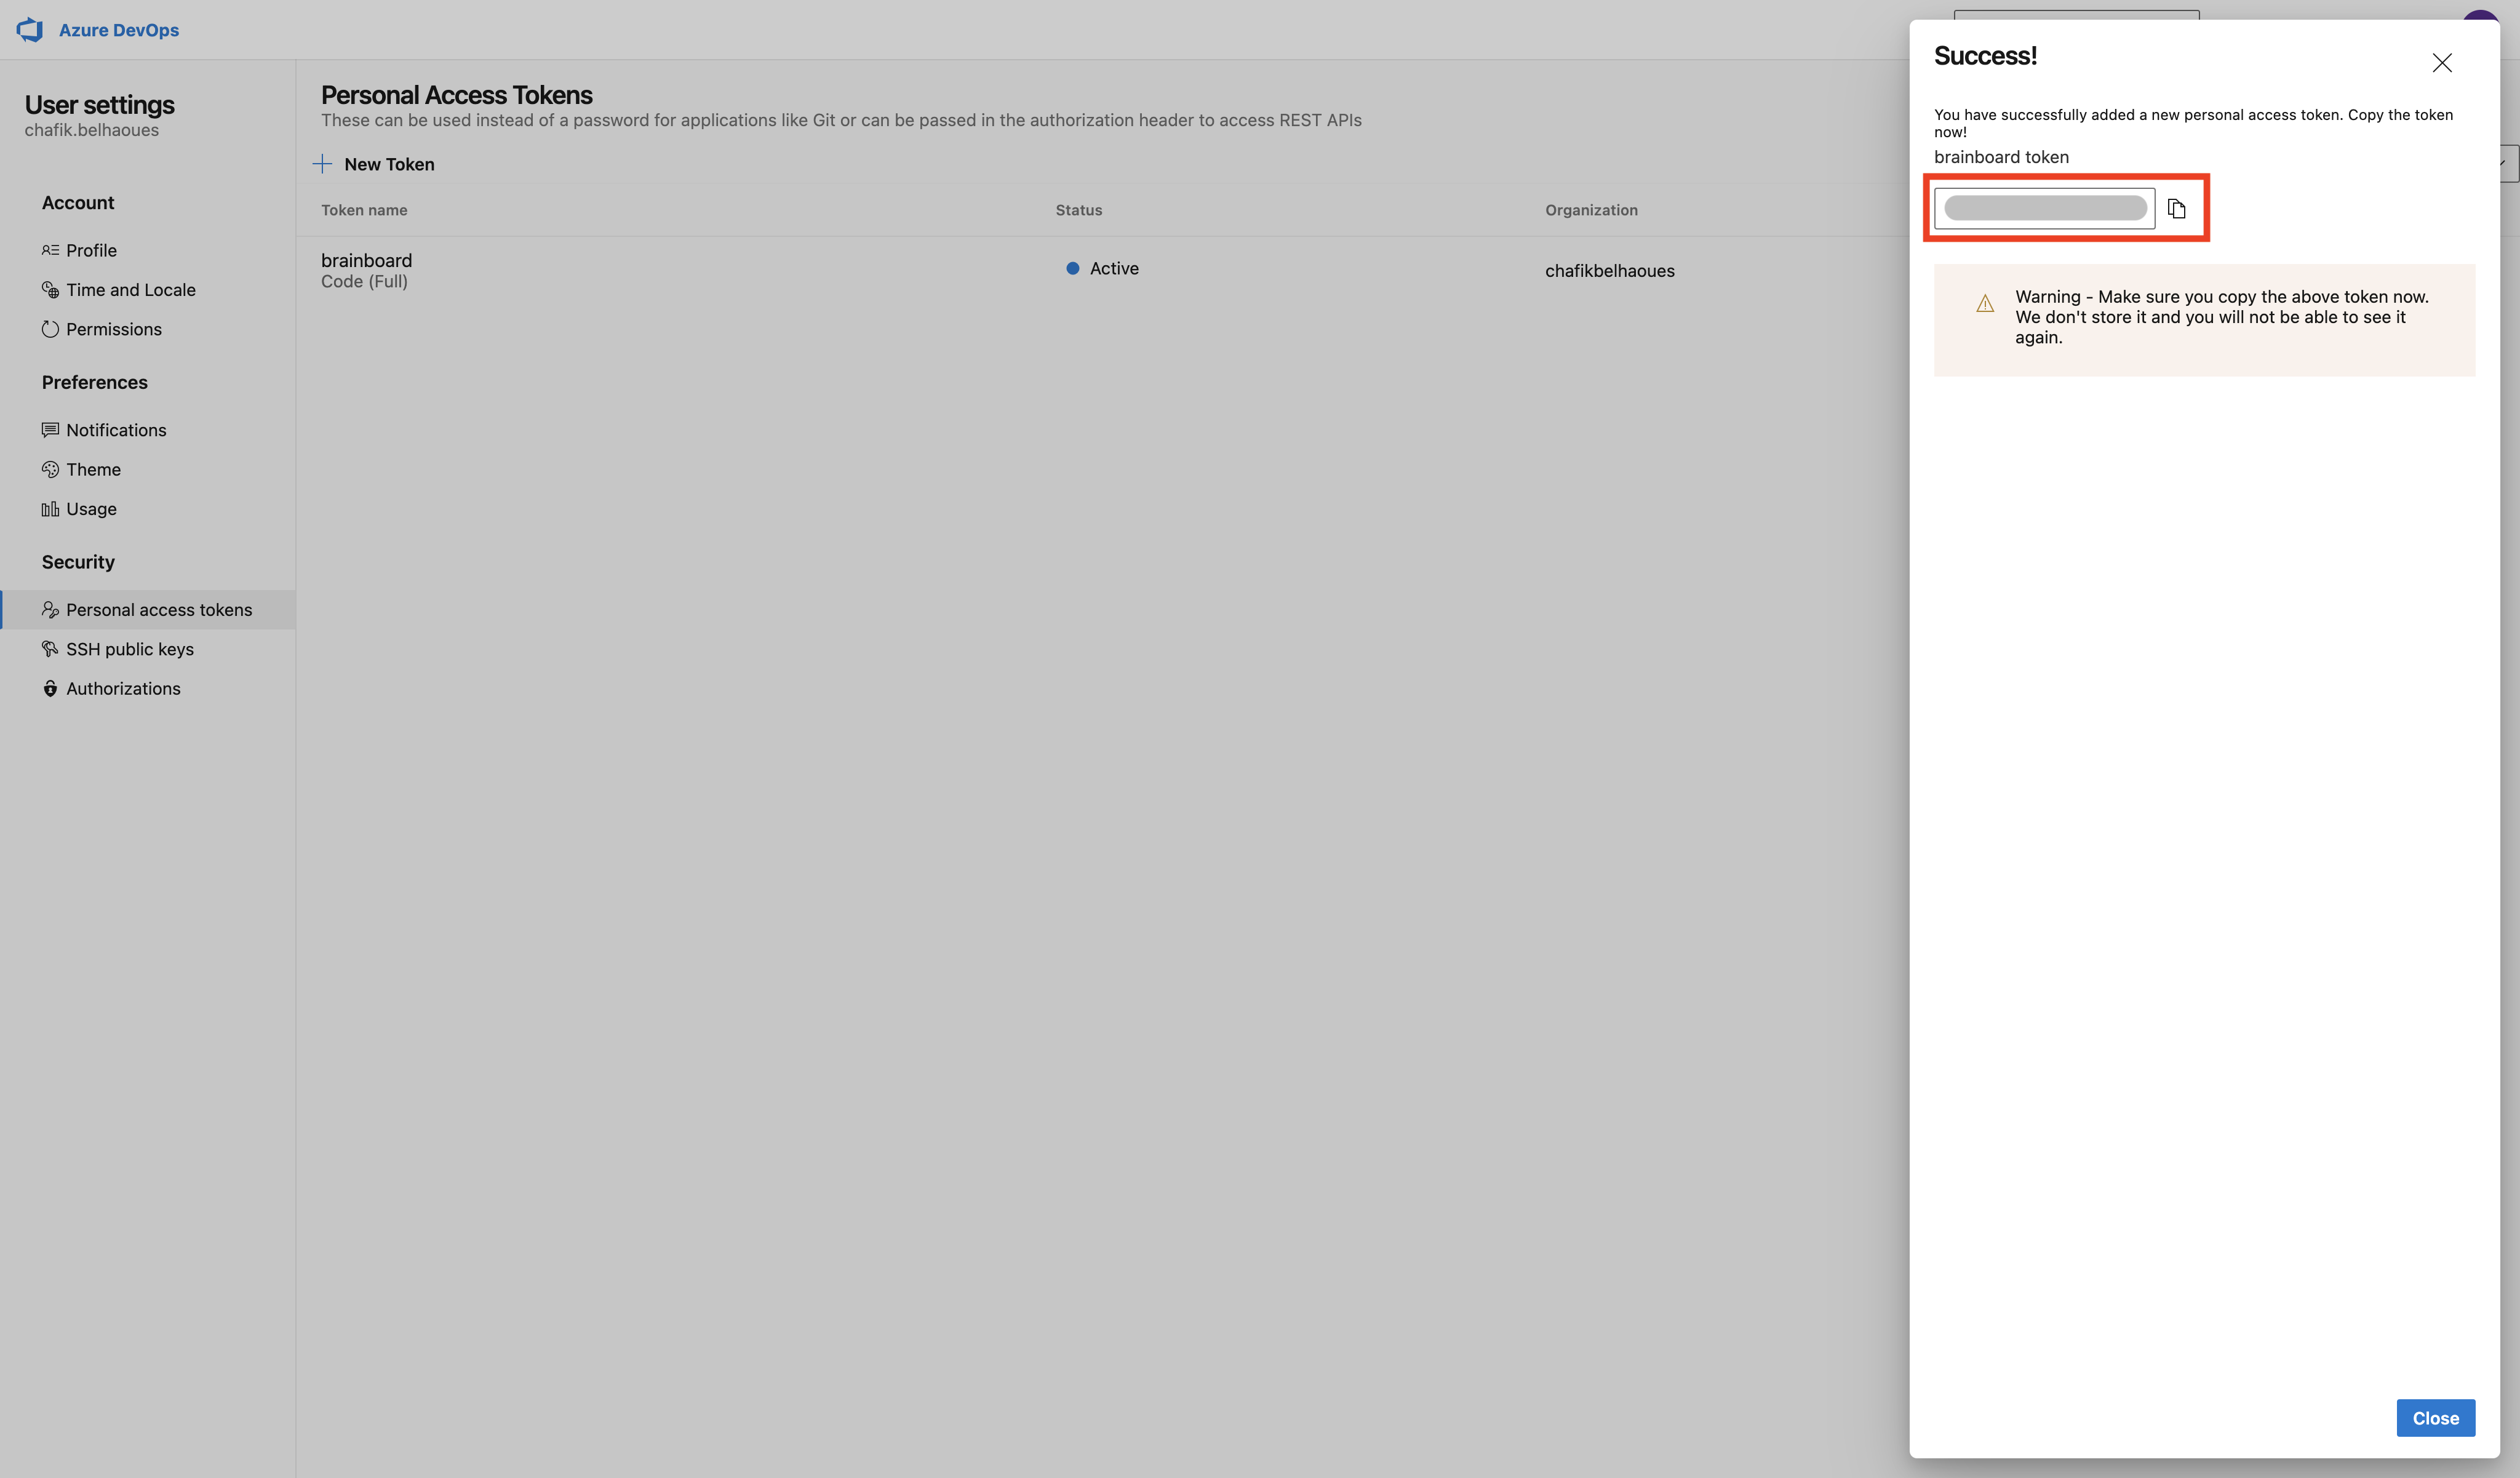
5. Once the token is generated, you can copy it to add to **Brainboard****.**
#### Steps to add the generated token in **Brainboard**
1. Go to the [Git connections](https://app.brainboard.co/settings/integrations/git) page. Or, navigate to the path: **Settings > Integrations ? Git Connections.**
2. Click on **`Add connection`**** ****.**
3. Switch to the **`Azure DevOps`** tab.
4. Add your credentials in the displayed window.
* **Name** of the token. This is only for Brainboard, it will not be used when you do a pull request.
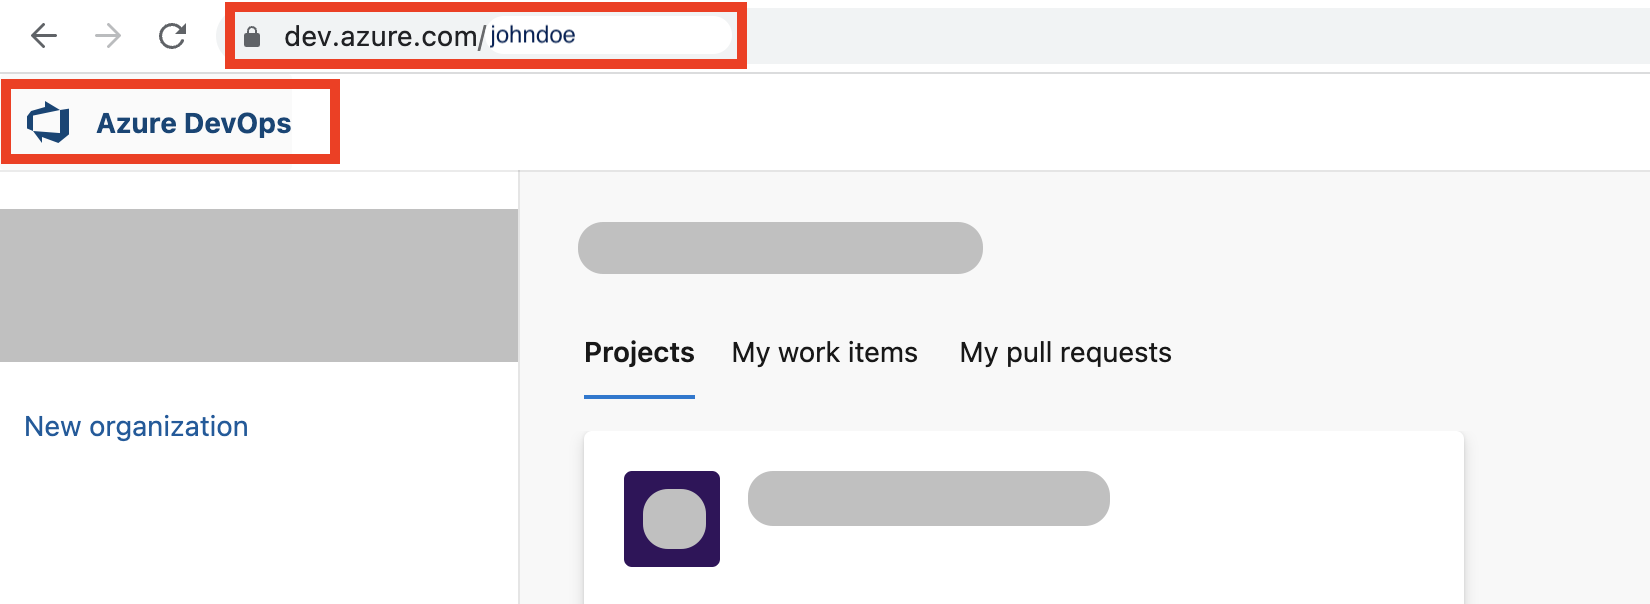
* The **URL** of your **Azure DevOps organization**.
* To get this URL, the simplest way is to click on **`Azure DevOps`** on the top-left button, then copy the URL from the browser
* **Token:** The token (secret) generated from your **Azure DevOps** account.
5. Then click the **`Save and close`** button.
6. **Brainboard** will verify if the credentials are valid:
1. **Valid credentials:** In this case, **Brainboard** displays a success message, and you can see the integration now in the **Git** connection page.
2. **Invalid credentials:** In this case, you'll receive an error about what is wrong. For example, the one shared below.
### How to use
Please refer to the page [How to use](/settings/integrations/git-configuration/pull-requests.md) to understand how you can use your **Git** connections, whether you want to do a pull request and import your code from Git.
### Edit or delete connection
1. Go to the [Git connections](https://app.brainboard.co/settings/integrations/git) page.
2. Click on the connection that you want to edit or delete.
3. If you want to edit, simply make your changes and click the **`Save and close`** button.
4. To delete, click on the **`Delete Configuration`** button given at the bottom right corner of the page.
5. Click on the **`Delete`** button again to confirm your action.